Let’s face it, most exercise programming has become an agonizing, drool inducing set up of routines anyone can write and no one wants to do. Somewhere along the lines, we forgot to make exercise FUN. We lost our ability to create more engaging workouts and routines at the fear of shattering our clients who we pre-conceived as Mr. Glass, because that’s what our textbook taught us.

Finding exercises that coincide with our clients lifestyles (and ours for that sake) are wildly important. Let’s step outside the boundaries of “traditional exercise” and take a walk through the world of unconventional.
**Flashback Alert**
When I started working out, there were only a handful of exercises that “worked”. Wait, let me widdle that down even further. There were only a few pieces of equipment that worked ON TOP OF the handful of exercises that work. This may seem okay – but in retrospect – this simple vision of what exercise SHOULD be really skewed my vision for a long time.

When I was a younger coach, I got tired of working during primetime training hours and ALL the equipment was taken (good luck programming anything with 45 pound dumbbells at 6:00pm). There was, however, the pile of equipment no one else was well-versed in.
MEET THE LAND OF MISFIT EQUIPMENT!
Here comes my introduction to the Landmine. While you might know about the landmine, our job is to create workouts that are engaging, challenging, and fun.
WHERE DID THE LANDMINE GET CREATED?
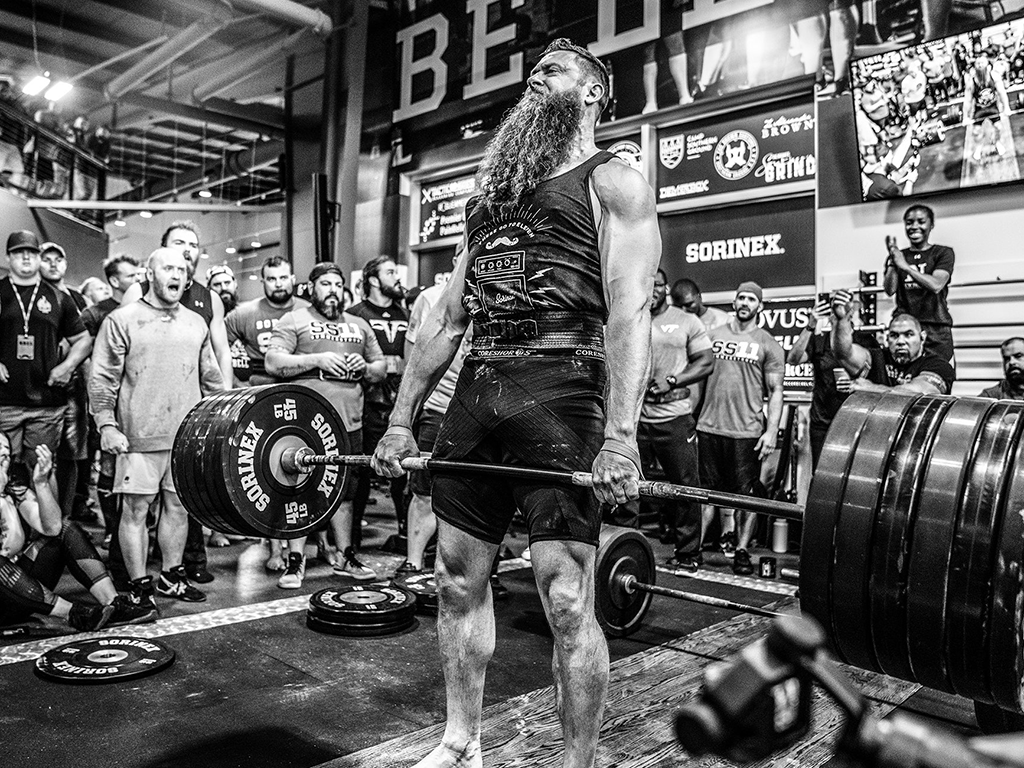
Talk about truly fabricating a piece of equipment for your own personal needs. The landmine was first created at the home facility of Sorinex. In 1999, Bert Sorin was practicing for the 2000 Olympic trials for the hammer throw. In true Sorinex fashion (known for their high quality gym outfitting), the family created a custom piece of strength equipment to help Bert for his training.

Hammer throwing is a track and field sport where athletes throw a ball attached at the end of a metal wire for distance. I know, I initially thought it was a Chris Hemsworth-esq act summoning back to Asgard. But hammer throwing is the pinnacle of rotational training. So, a pivoting base with loadable strength capacities was an ideal setup for someone looking to work on power through “unconventional” training. The Landmine is just one of the many pieces of revolutionary equipment that has come out of the Sorinex workshop.
Since that point in time, the piece has been adapted to attach to racks, pivot within loose plates, and live on a “home base” as it was originally constructed. Its adaptable feature makes it one of the truly minimalist pieces you can find in a gym. A lot of power confined within such a small footprint.
WHAT IS THE PURPOSE OF THE LANDMINE?
Angled barbell training can bring together so many different aspects of training we tend to neglect. Exercises should be simple – principles should be complex. Creating this environment to construct a space for ease of learning while layering on top of the body’s highly complex system; that’s where the gold is.
SEMI-CIRCULAR PATTERN
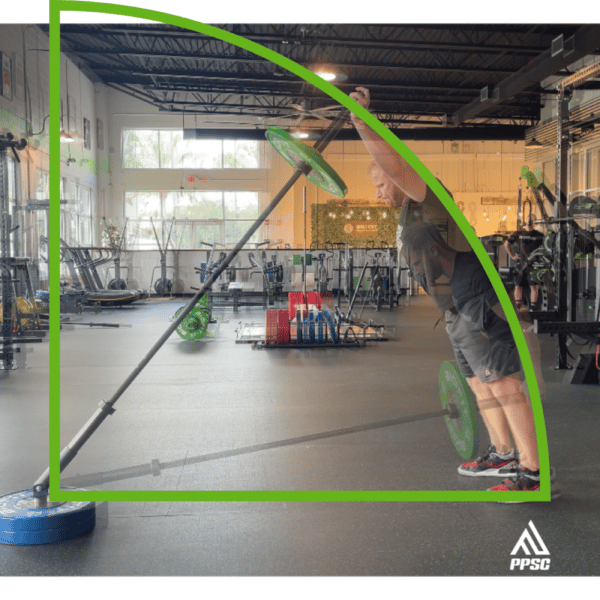
Most movement patterns, whether you notice or not, are done through a semi-circular pattern. This is because of the major movement junctions in our body – the shoulder and hips – being ball and socket joints.
As the arm or leg moves its pattern along the fixed access of the joint, the end of the joint (distal) creates a semi-circle. This is the hallmark feature of the landmine. One fixed pivot point with the long lever pivoting around it – sort of like – your limbs on the ball and socket, no?

The semi-circle also amplifies our ability to make what would be normally difficult tasks through the vertical plane, more user-friendly through the angled plane. Take for instance overhead pressing. Many people run into difficulties with overhead pressing because of lack of strength, mobility, or skill acquisition. The angled nature of the landmine allows somebody to work through a more inclined bar path versus the vertical nature of a traditional overhead press.
When a weight gets too heavy, you lose your ability to focus on proper movement patterning. As we know, patterning matters (a lot). Drilling in this skill acquisition earlier in the process can allow you to challenge your movements freely without the constant concern of failure.
LATERAL STABILITY
We don’t focus as much on the side to side nature of stability as we should. When we use free weights, we have to balance some sort of weight in all different directions because of the balancing act called center of gravity.
The landmine, however, has the fixed portion at the long end of the barbell. From there, the bar has the ability to move side to side. This side to side stability is amplified as it’s the bars only ability to get back down to the ground.
EASE OF USE
At first, the landmine may look intimidating to clients. We can either blame that on the meathead doing heavy T-Bar rows in the gym as their only example, or we can teach them!
When it comes to setting up an exercise, the landmine is almost as easy as it gets: Insert barbell in landmine base. End directions.
Don’t forget the fact you only have to load one side of the bar. Less plates needed to load up the weight while still packing some serious punch. So while everyone is flooding the adjustable bench section at the gym you’ll be peacefully paying your dues in the corner.
*Check out our Video on Programming Vertical Pressing with the Landmine HERE
PIVOTING FROM CONVENTIONAL THOUGHT
It can become a slippery slope when we get stuck within the walls of what we “think” is appropriate movement. Because, what defines appropriate anyway? Always go back to these two basic questions:
Is this getting them better in line with their goal?
Is this a safe activity for them to be doing?
Simple and to the point.
Those walls of that conventional room seem pretty thin when you stick to those two questions. The client matters, or if it’s your program, YOU matter. So let’s explore some moves to make you stronger, more athletic, and more resilient.
THE MOVES
Okay, here comes the good stuff. The Landmine is more than just a barbell to front squat and shoulder press. So much of our routines are stuck in the sagittal plane (front and back) but so little of our lives actually exist in the sagittal plane. It’s time to break the mold and focus more on simply getting better.
SINGLE ARM CLEAN TO PRESS
Power training is a necessary component of programming at any age. The single arm clean coaches you to transfer weight from the hip to shoulder in a clean motion, finishing with an overhead press. This is going to integrate every joint system in the body elevating weight from waist to overhead.
HOW TO: Begin in an athletic stance with the end of the barbell in your hand by your pocket. Load the legs and explode upward (planting the balls of feet extending the feet, extend the knees and hips, shrug the shoulders) to propel the bar upwards. Punch the elbow underneath to catch the weight in front of the shoulder. From the loaded rack position, press the bar overhead allowing the scapula to move in conjunction with the arm. Slowly return the bar back to the starting position. That is one rep.
LANDMINE ZERCHER SQUAT
Zercher squats have become much more popularized over the last few years, and for understandable reasoning. Front loading squats is a great feature of the landmine – and to upgrade that – front loading your squats from the low position will adjust the mechanics of the squat remaining much more upright. The downfall to why people don’t do Zercher’s? That is a pretty obvious answer, the barbell hurts like all hell. Try the Landmine Zercher with a monster band or straps to low load the weight and not tear up your arms!
HOW TO: Begin with the straps at the top of your forearm near the crease of your elbow. Elbows should be bent more than 90 degrees to hold the straps on your arms for the duration of the move. From the bottom position of the squat, stand upward while remaining in tall posture. Emphasis for the move should be through your midfoot to heels. From the standing position, descend down by pushing the hips back and allowing the knees to bend. Once you reach the bottom, that is one rep.
SQUAT WITH SIDE STEP
Squatting is one of the most common moves for the Landmine. Locomotion, however, is rarely accessed. Considering its smooth nature in the lateral plane it’s a perfect match on strength and athleticism.
HOW TO: Begin in your normal squatting position with the end of the barbell in both hands at the top of your chest. Descend down into a squat position as low as you feel comfortable. From the bottom position, extend the left leg laterally and side step. Shifting back to the bottom squat position, return to the standing position. Repeat this process back to the right. Once you have completed it both ways, that is one rep.
ROTARY SINGLE LEG DEADLIFT
When we think about hinging patterns the emphasis is always on posterior chain work. While its a great sentiment, we neglect one of the key movement aspects of the hip: Rotation. The glute muscles as a group both internally and externally rotate the femur. Slight movement from the medial to lateral portions of the leg make this move markedly more functional.
HOW TO: Begin in a single leg stance with the end of the barbell in hand, on the outside of your leg near your pocket. Slowly hinge back while maintaining proper pillar stability, moving the bar from the outside of the leg towards the centerline of your body. From the bottom, pull your hip forward moving the barbell back to its starting position on the outside of your hip. That is one rep.
OVERHEAD CURTSY LUNGE
Curtsy lunging can be butchered so quickly because at first it just doesn’t feel smooth. Laterally loading the single leg can feel odd at first if you aren’t used to it. The landmine’s line of force can be used as an assistance to ease you into the end range of the move. Now progress that to overhead – elongating and loading the close side while loading the lateral line of the lower body on the opposite side.
HOW TO: Begin with the bar pressed overhead on one side. While maintaining pillar stability, descend laterally into a squat with the outside leg. The inside leg will hover above the ground and thread behind the working leg. Descend down as far as comfortable, ideally getting just below 90 degrees. From the bottom position, stand up through the outside leg to bring yourself back up to the standing position. That is one rep.
ALTERNATING SOTTS PRESS
Pressing at veritcal-ish angles is something we already know can be a big help for long term shoulder health. We also know the importance of grooving a squat pattern for silky smooth hips. Try adding the tension of both of those exercises into one combination – otherwise known as the Sotts Press.
HOW TO: Begin in the standing position with feet in your squat stance and the bar loaded at one shoulder. Descend down into the squat while maintaining tall posture throughout. From the bottom of the squat, press the bar overhead transferring the weight to the other hand. Slowly control the bar down to the newly place shoulder. From this spot, drive your feet into the ground to stand back up to the starting position. Repeat the move to bring the bar back to the beginning shoulder. That is one rep.
SQUAT TO TALL KNEEL
Tall kneeling is one of the key developmental patterns. Transferring between the tall kneeling pattern to movement, now that’s a party. Shifting from tall kneeling, to half kneeling, to squat. You can’t get more functional than that. Oh, and you are going to add weight to progressively get strong through this shifting pattern.
HOW TO: Begin in your normal squatting position with the end of the barbell in both hands at the top of your chest. Descend down into a squat position as low as you feel comfortable. From this bottom position, transition the right leg down into the kneeling position. Follow this by bringing the left leg down until you are standing with a tall posture on both knees. From this position, bring the right leg forward into a lunging position following that with the left leg until back in the bottom squat position. That is one rep. Complete equal reps in both directions.
REVERSE 45 DEGREE ROW
Let’s cut to the chase – there are multiple ways to row. One of those directions we neglect to hit is the midpoint between supinated and neutral grip. Supinated grip utilizes more musculature (namely the biceps) to complete rowing patterns. This 45 degree angle uses some of that extra strength in complement to a more natural pulling motion. Really, a superior movement.
HOW TO: Begin in an athletic stance with the end of the barbell on a 45 degree angle from the knee opposite of the active side. Grip the bar with your hand midway between palm up and neutral. While maintaining a tall posture, pull the weight back initiating the move from the upper arm. Pull back ideally to an inch or two past your torso. Slowly return the weight back to starting position allowing the shoulder blade to move with the arm. That is one rep.
REVERSE ROTATIONAL PULL
Most, but not all rotation occurs in front of us. So lets not neglect posterior chain dominant rotation. Think of the motion of starting a lawn mower. If you are anything like me, you aren’t just pulling with your arm but rotating the body to create the most power possible.
HOW TO: Begin in the half kneeling position with the leg away from the barbell forward. Grab the barbell with the near side hand. Explosively drive up in a split squat position pivoting on the feet. While maintaining pillar stability, pull the barbell high towards your nearside shoulder driving the elbow up and back. As you rotate 90 degrees towards the landmine, catch the weight in front of your active side shoulder in an athletic stance. In a controlled fashion, return the bar back to starting position. That is one rep.
QUADRUPED WALK OUT/WALK BACK
We talked about how the landmine travels in semi circular patterns, right? Why not use that to your advantage when it comes to locomotive movements? Movement in a true four point stance allows you to focus on pillar stability in the presence of motion. Now, stop the patterns and walk yourself back to the starting position. This might be one of the most challenging new exercises you do!
HOW TO: Begin on your hands and knees with your hands gripping the barbell straddling the plate. While maintaining pillar stability, raise the knees off of the ground into a true four point stance. Slowly walk the feet forward while maintaining the bar underneath your shoulders. Walk out a 90 degree turn and pause. From this position, slowly walk yourself back to the starting position by planting the feet and pulling your knees up towards the body. Once you return to your starting position, that is one rep.
*BONUS* REVERSE 45 POWER ROW
Take everything we discussed with the 45 degree row and now add in lower body integration. The strength pattern requires a static lower body to root stability for maximal muscular output. Power patterning varies as hip shift is an integral part of its overall function. Simultaneously, the hip rotation feeds into the torso where pillar stability is maintained. This energy transfers to the upper quadrant of the body where the pull finishes off the move.
How to: Begin in an athletic stance with the end of the barbell on a 45 degree angle from the knee opposite of the active side. Grip the bar with your hand midway between palm up and neutral. While maintaining a tall posture, rotate the same side leg as the gripping hand in on a 45 degree angle. To begin, shift the near side hip forward while extending the back leg in a powerful manner. At the same time, punch the near side shoulder towards the ground
*BONUS* LANDMINE Y PRESS
The pressing component of the Landmine is one of the most alluring features to the piece! The angle of pressing getting most overlooked is the Y Press. Pressing out and away from the body to extend the arm but not go truly vertical.
HOW TO: Begin with the bar in line with your body from the side you plan to work on, bar loaded at shoulder. From the position gripping the end of the barbell, press the bar vertically while maintaining a tall posture throughout the movement. The end position will be the barbell extended out and up from the body. In a controlled motion, slowly allow the barbell to descend back to your shoulder. That is one rep.


